

How to Add EU Privacy Policy on Your Website: A Practical Guide
Are you looking for a legally recognized way that increases the value of your website to a great extent by securing users data? If this is the case, you have come to the right place. When visitors are assured of appropriate safety to their personal and sensitive data, they will feel no worries. Moreover, it helps them surf your site in a relaxed mode which increases the possibility of boosting your site’s conversion.
Similarly, when operating your site in countries under European Union (EU), it’s mandatory to display the EU privacy policy on your website that acts as a safeguard against any legal issue claimed by the users.
Considering the importance of privacy policy for EU visitors, you should have a clear idea of how you can add the EU website privacy policy template to your website. In this article, we will be showing you a step-wise guide on how to add an EU website privacy policy template to your website easily.
Let’s dive right in!
Adding EU Privacy Policy (A Stepwise Guideline)
This guide will show a detailed step-by-step guideline on how you can add the EU website Privacy Policy template to your website. Before going deep into this process, make sure your website is built with WordPress. Moreover, we will complete the overall process using a dynamic WordPress plugin named ‘ Legal Pages Pro‘.
Step 1: Upload and activate ‘Legal Pages Pro’
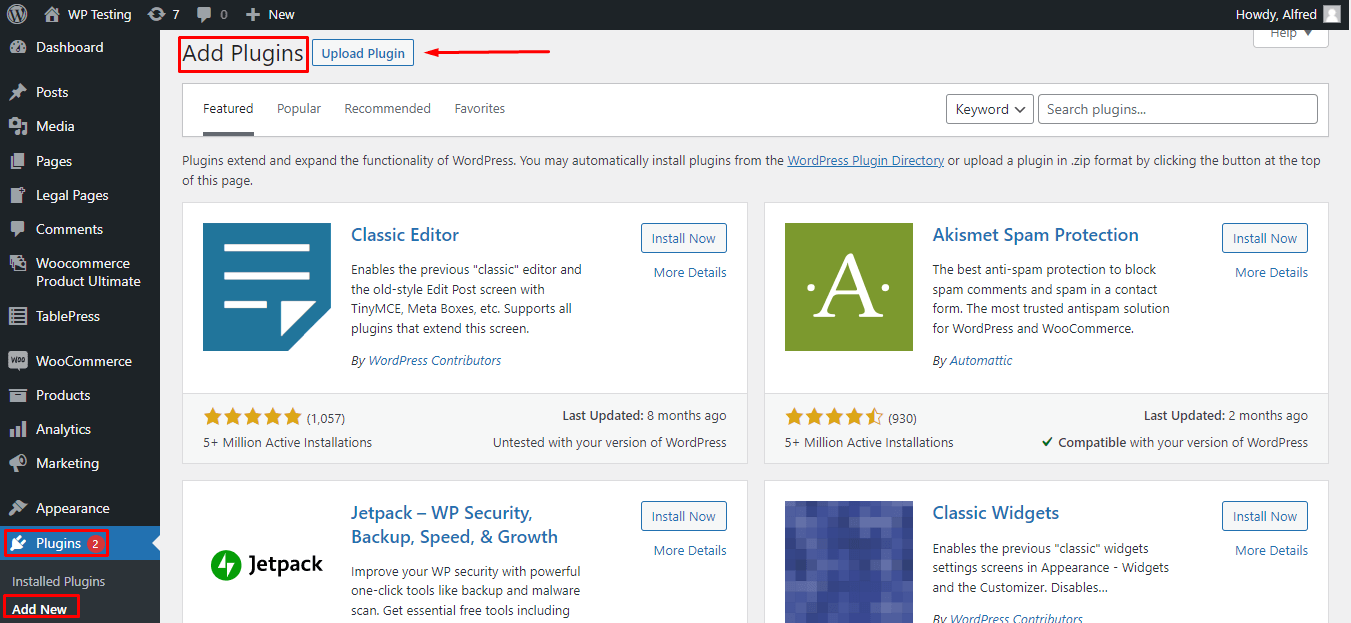
Since ‘Legal Pages Pro’ is a premium version plugin, you need to upload it. First, go to your WordPress Admin Dashboard and click on Plugins➤ Add New. You will be redirected to the Add Plugins page. Now, click on Upload Plugin to set ‘Legal Pages Pro’ on your website.
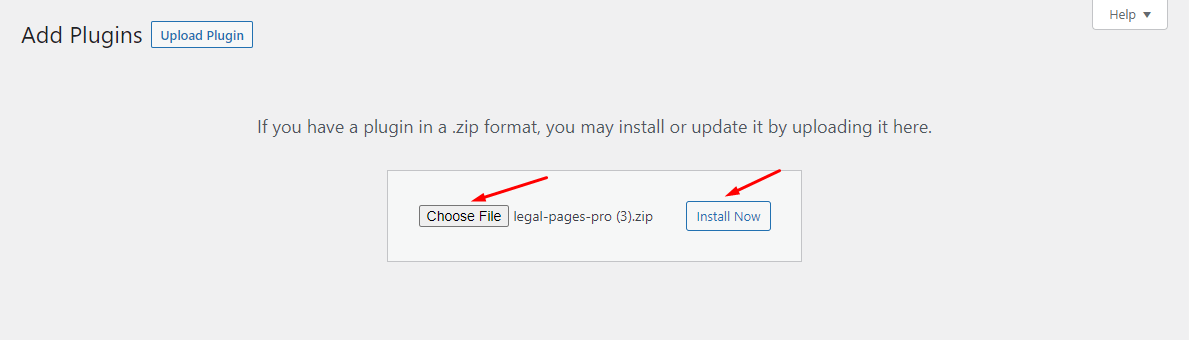
Clicking on ‘Upload Plugin’ will redirect you to install the ‘Legal Pages Pro’ on your website. To do this, click on Choose File to upload the .zip format file of the plugin. After selecting the file, click on Install Now to install the plugin.
You have successfully installed ‘Legal Pages Pro’ on your website. Next, click on the Activate Plugin to make it into Action on your website.
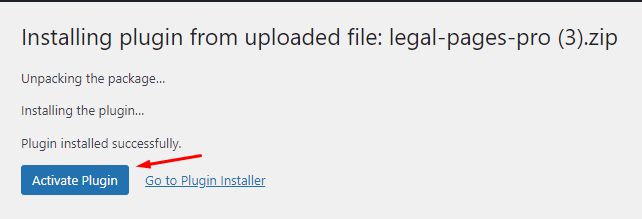
Finally, ‘Legal Pages Pro’ has been activated successfully on your site.
Step 2: Take a tour of the ‘Settings’ panel
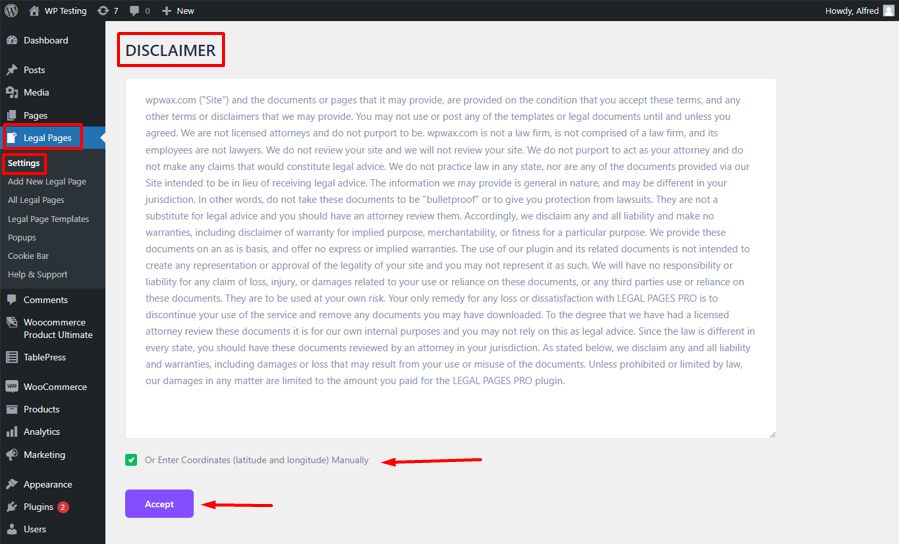
Before adding an EU GDPR Privacy Policy page on your website, it’s essential to perform some basic functionalities. For this purpose, first of all, click on Settings under the Legal Pages menu in the Admin Menu Bar. This activity will take you to the ‘Settings’ page.
Once you have redirected to this page, a Disclaimer notice will appear first. Read this notice carefully and check if you understand it. Lastly, click on Accept to proceed.
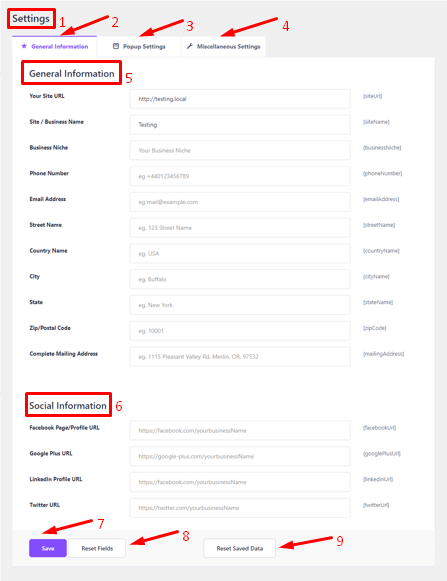
Right now, you are on the Settings page. The page consists of three different parts: 1. General Information, 2. Popup Settings, 3. Miscellaneous Settings. Let’s explore them.
The ‘General Information’ part consists of two different sections: 1. General Information. 2. Social Information. Provide some basic information about your site or business like Name, URL, contact information, and more in the ‘General Information’ section.
Next, in ‘Social Information’, give the URL links of different social media you use for your website or business.
After filling all the required fields in the ‘General Information’ section, click on Save button to store all the changes. If necessary, you can reset any field by clicking on Reset Fields. Moreover, you can save the newly set data by clicking on Reset Saved Data.
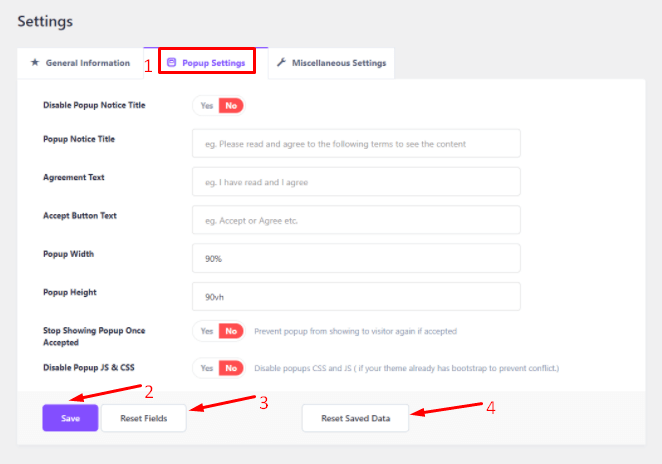
Next, you will work with the Popup Settings section. This part is helpful if you want to display a Popup notice on your site. Just provide some basic information to set up the popup on your site and click on Save button to store everything. Like ‘General Information’, there are options like Reset Data and Reset Saved Data to serve similar purposes.
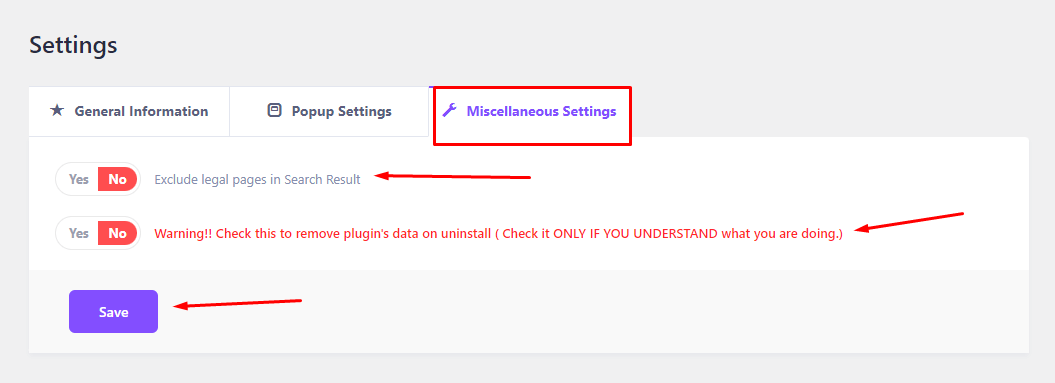
It’s time to explore the Miscellaneous Settings. It consists of two sections. In the first one, you can hit ‘Yes’ if you enable displaying ‘Legal pages Pro’ on Search Result. It’s necessary to handle the second option carefully because checking the ‘Yes’ button will erase all the plugin’s data from your site.
Step 3: Add EU privacy policy template
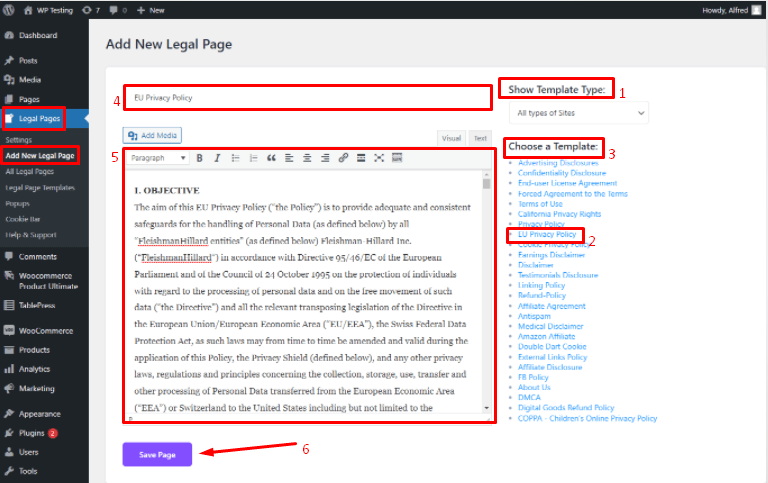
Now, you are ready to add an EU website privacy policy template to your website. To serve this purpose, return to your Dashboard’s Admin Menu Bar and click on Legal Pages➤Add New Legal Page. This action will take you to the ‘Add New Legal Page’.
First of all, go to Show Template Type and select the types of your website. Next, choose the EU Privacy Policy template from Choose a Template option.
After selecting this particular template, the Title and Paragraph part will automatically be filled by the EU GDPR privacy policy template. If necessary, you can edit the paragraph or title part by adding or removing information. Finally, click on the Save button to store the changes.
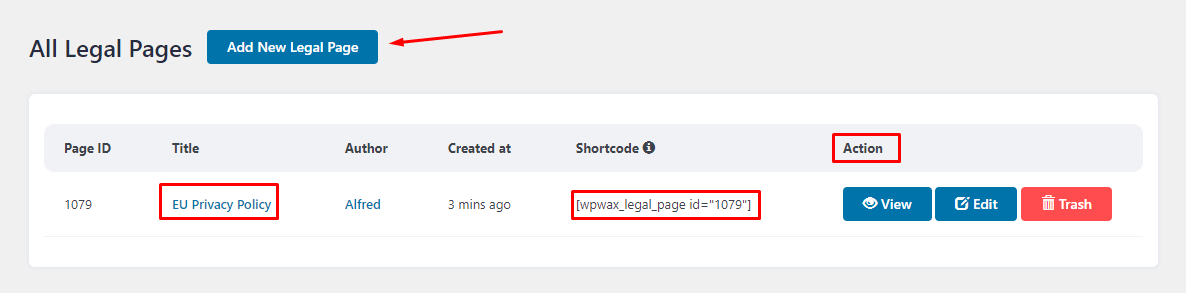
So, you have successfully added the EU GDPR Privacy Policy page on your website using a ready-made template. Next, click on Legal pages➤All Legal Pages to explore where it has been stored. If you want to include more, click on Add New Legal page.
To hassle freely display the newly created EU GDPR privacy policy on any post or page, Copy the Shortcode that belongs to it and paste it to your favorite post or page. Besides, using Action you can view, edit or trash the recently created legal page.
This is how you can successfully add EU website Privacy Policy template to your website.
Finishing Off
It’s always better to be on the safe side before anything wrong occurs. Likewise, to keep away from any legal issue regarding the security of users’ personal and sensitive data, as a savvy site owner, you should keep a privacy policy page for your site. To operate your website in the EU-based countries hassle-free, you must keep an EU website privacy policy template to overcome unwanted legal issues.
To make things easier, In this guide, I have shown an easy guide of adding an EU privacy policy template for your site. I hope this tutorial has guided you through the easiest way to add a privacy policy on your site using a template. If you have any queries, don’t feel shy to express them in the comments section.
If you liked this post, don’t forget to subscribe to our blog so that we can notify you once any post is published. Finally, you can also follow wpWax on Facebook, Twitter, and LinkedIn for more exciting news, offers, and product updates.

Abdullah Al - Harun
Abdullah Al Harun is a technical content writer at wpWax and a digital marketing enthusiast. Apart from tech, he enjoys reading books on different aspects of communication, journalism, science, and arts. On his time off, you will find him playing cricket with his teammates.


Leave a Reply
You must be logged in to post a comment.