

How to Add California Privacy Rights Acts: An Easy Guide
At present, many countries have enacted different privacy laws to ensure legal safeguards regarding the private and sensitive information of the citizens and residents from specific regions when they visit any website.
Henceforward, to successfully operate your website in these particular regions, or if someone visiting your website is a resident there, you must display the acts regarding these areas. It’s a regulation that helps you smoothly run a website without facing any legal hassle.
Among different laws related to particular regions, having a transparent idea on how to add California Privacy Rights Acts (CPRA) is a significant one. This law is the extended version of the existing California Consumer Privacy Act. Though it has already been enacted from the start of 2023, you should make your website compliant with CPRA. To help you in this regard, we are going to demonstrate the complete process of adding CPRA on your website. So, let’s begin.
A Gradual Guide on How to Add California Privacy Rights Acts on Your Website
Right now, you are about to explore the process of displaying the California Privacy Act Rights on your website. First, install WordPress as the dedicated Content Management System (CMS) of your website to do this.
To complete the overall procedure, we will use a robust plugin called Legal Pages Pro by which you will be able to add California Privacy Rights Act to your website with a minimalistic effort. The overall procedure will be continued in a stepwise process. So why wait!
Step 1: Upload and activate the plugin
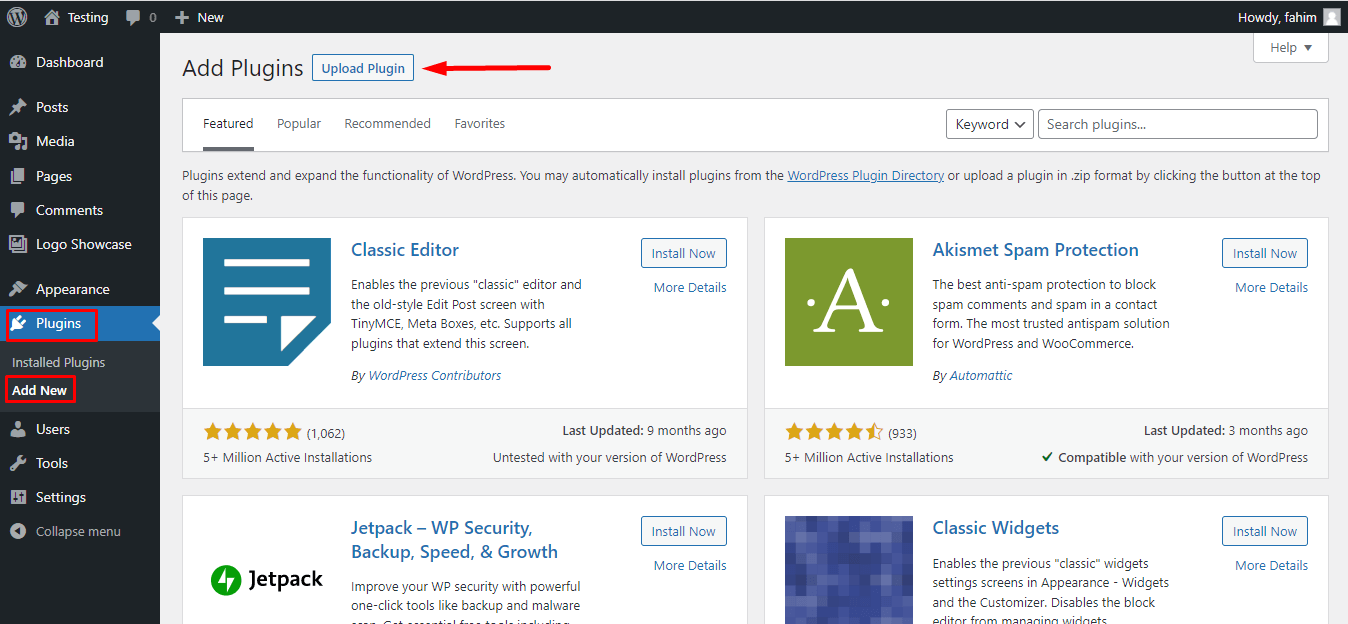
Firstly, it’s time to upload the ‘Legal Pages Pro’ on your website. To do this, go to your Dashboard Admin Menu bar and click on Plugins ➤ Add New. You will be redirected to the Add Plugins page. Now, click on Upload Plugin to upload the plugin.
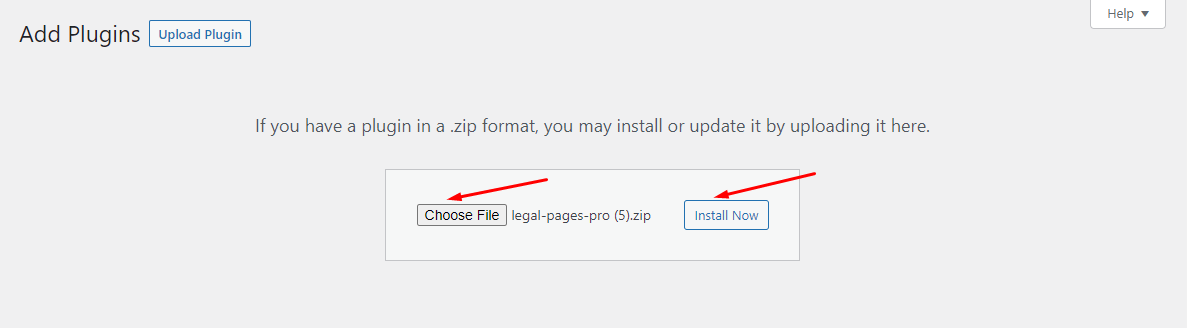
You will get the option where you need to select the .zip format file of ‘Legal Page Pro’ by clicking on Choose File. Once you have chosen the file, click on Install Now to install the plugin on your website.
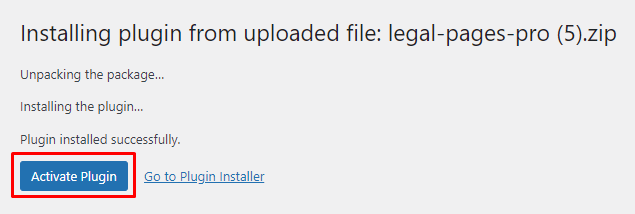
Once the plugin is installed successfully, click on Activate Plugin to make it active on your site.
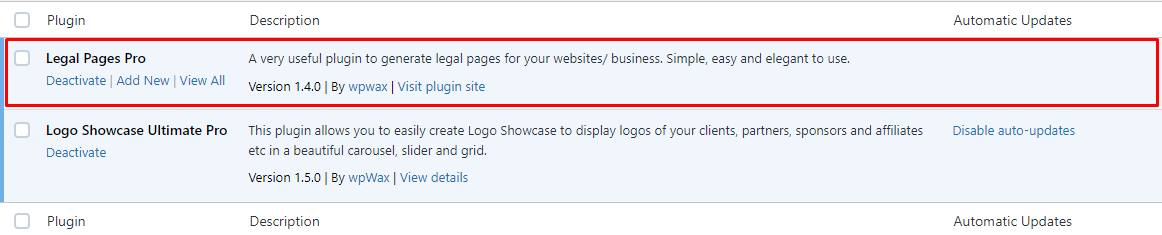
Now that you have successfully activated ‘Legal Pages Pro’ on your website.
Step 2: Explore the plugin’s settings panel
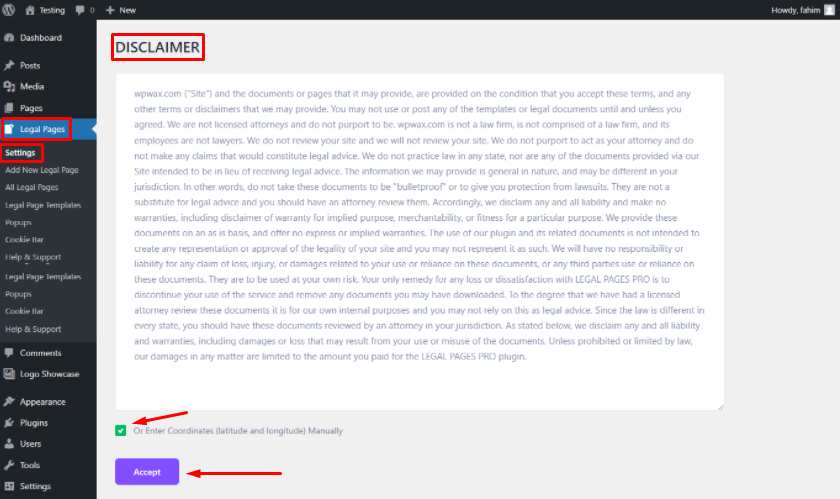
After activating the plugin successfully, let’s take a deeper look at its Settings panel. To do this, go to Legal Pages ➤ Settings. This Action will take you to the Disclaimer Page.
Read the documents carefully and tick the Box below them. Once you tick it, the Accept button will appear. Click on it. You will be redirected to the ‘Settings’ page.
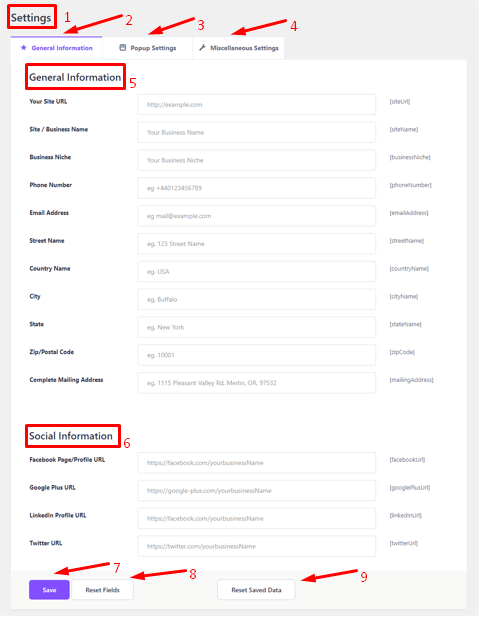
Right now, you are on the Settings page. This page allows you to deal with three different Settings options; each of them comes with multiple functionalities: General Settings, Popup Settings, and Miscellaneous Settings.
In ‘General Settings’, you need to provide two types of information: General Information and Social Information. For the first one, give the basic information about your website and business to identify its presence easily both on the web and geographically.
For the second one, provide the URL address of your website’s multiple social media platforms. After filling up the information, click on Save to store the changes. You can change any data by clicking on Reset Fields. Lastly, click on Reset Saved Data if you reset any field.
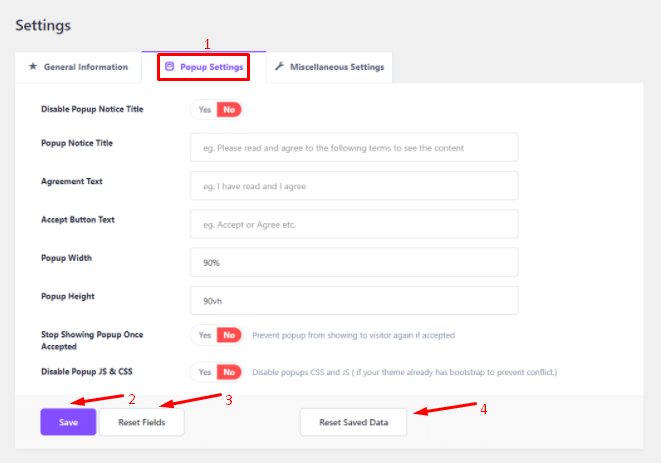
The Popup Settings abounds with multiple functionalities with which you will be able to display any legal page templates effortlessly anywhere on your website in a popup notification format.
With its robust functionalities, you can make the popup displaying experience more attractive to the users.
After making all the necessary changes, click on the Save button to store the changes. However, you can make further changes by clicking on Reset Fields and saving it using Reset Saved Data.
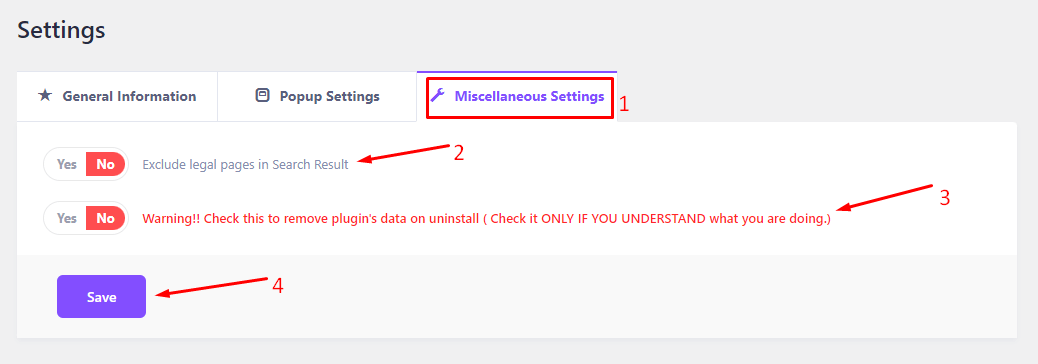
Lastly, in Miscellaneous Settings, there are two options available out there. In the first one, click on ‘Yes’ if you want to exclude legal pages in the search result. However, be careful to deal with the Second one because clicking ‘Yes’ will permanently remove all the plugin’s data. Click on Save to store the changes.
Step 3: Add ‘California Privacy Rights Act’ on your website
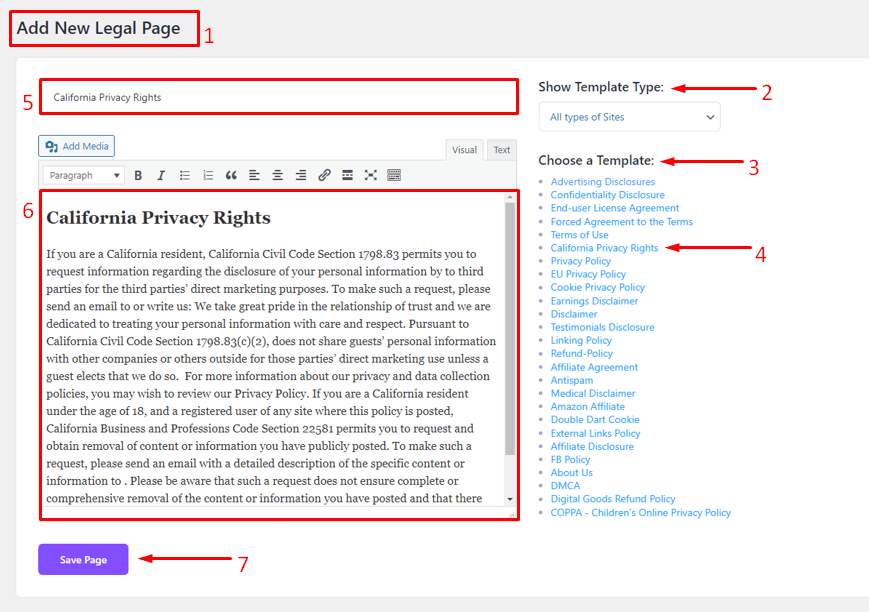
To add California Privacy Act Rights to your website, return to the Dashboard and click on Legal Pages ➤ Add New Legal page. You will land on the Add New Legal Page. This page offers different kinds of ready-made legal page templates with which you can generate legal pages in a short time.
First, click on Show Template Type to select the website type to get templates that match your website type. Now, from Choose a Template, click on the template named California Privacy Rights, and the Title and Paragraph part will be fulfilled automatically with the template’s title and body text. And finally, click on Save Page to store the recent changes.
Step 4: Explore where the newly created legal page for ‘California Privacy Rights Act’
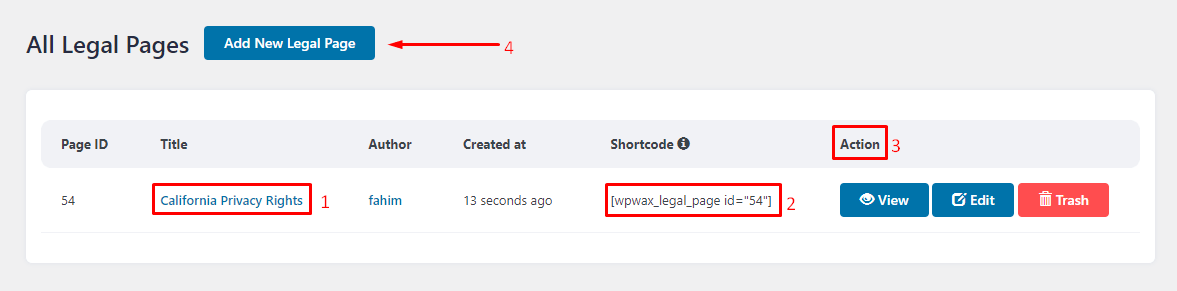
So, you have effortlessly added the California Privacy Rights page on your website using a template. Now, let’s see where this page has been stored. To do this, click on Legal Pages ➤ All Legal Pages. You will be taken to the ‘All Legal Pages’. Your recently created legal page on California Privacy Rights has been stored here.
You can copy the Shortcode belonging to it and paste it anywhere to display this legal page in no time. Besides, in Action, you can view, edit or delete the page. You can also add a new legal page from here by clicking on Add New Legal Page.
Finishing Off
Taking advanced protection before anything wrong happens is a good sign of a savvy business owner. So it would be best if you had been vigilant enough to ensure proper safety for your website against any legal litigation. Displaying a California Privacy Act Rights is one of these processes that helps your website stay secured from unwanted legal litigation.
Considering this fact, in this guide, we have shown you an effortless way on how to add California Privacy Rights Acts on your website with a template very easily. We think, from now on, it’s not a big issue for you to find a proper way of adding legal templates in a complicated way. Let’s raise your voice on how this article helps you.
If you liked this post, don’t forget to subscribe to our blog so that we can notify you once any post is published. Finally, you can also follow wpWax on Facebook, Twitter, and LinkedIn for more exciting news, offers, and product updates.

Abdullah Al - Harun
Abdullah Al Harun is a technical content writer at wpWax and a digital marketing enthusiast. Apart from tech, he enjoys reading books on different aspects of communication, journalism, science, and arts. On his time off, you will find him playing cricket with his teammates.


Leave a Reply
You must be logged in to post a comment.