

How to Insert a Table in WordPress Easily without Using A Plugin
WordPress is a great platform for building websites and blogs. It’s user-friendly and has a ton of features that make it easy to use. One of the features that WordPress has is the ability to insert tables into your posts and pages.
Tables are a great way to display data in a structured way. You can use tables to present information in columns and rows, and they can be formatted to look like any other type of content on your website.
In this article, we’ll show you how to insert a table in WordPress. We’ll also share the process of formatting your table to make it look great.
How to Insert a Table in WordPress ( A Stepwise Process)
No more hassle or confusion—our step-by-step process will demonstrate the art of table creation. Whether you’re a seasoned WordPress pro or just starting your online journey, you’ll learn how to effortlessly bring your data to life with stylish and structured tables.
Step 1: Get entry to the Gutenberg Block Editor
You can insert a table using the powerful WordPress Gutenberg block editor. To do this, stay on any WordPress post or page and click on the plus sign to get entry to the Block Editor. Next, write ‘Table’ in the search option.

Step 2: Add columns and rows
Next, decide how many columns and rows you want to include in the newly created table. If necessary, you can add or delete more columns to your table later. The default number of columns and rows is 2.
But here, we will insert four columns and five rows in your newly created table. Once you have set the number of columns and rows in the list, click on Create Table.

Here, we have created a table with four columns and five rows.

Step 3: Customize the newly created table
Now, you can type in any of the cells, and depending on the text length; the cell will expand. To fix the cell width, click the radio button Fixed width table cells under Table Settings.

You can add a Header and Footer to your website if you want. You need to click on the Header or Footer menu to make specific changes. Here we have clicked on the Header section button, and a header is added automatically.

You can also change the Text and Background color from the color section. Just click on Text or Background under Color Section.

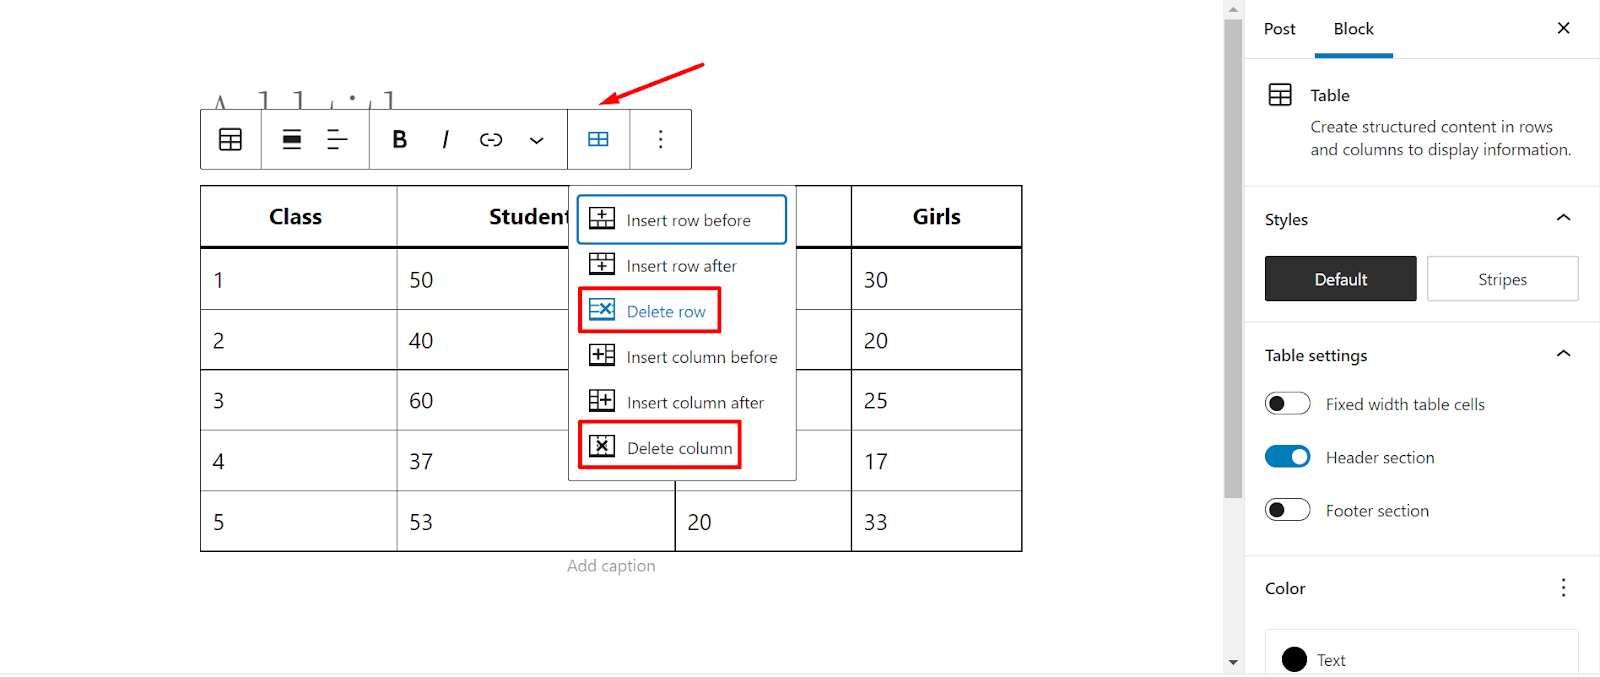
To add a new column or row on your website, select a particular cell and click on the Edit Table button. You have chosen a cell named ‘Girls’ and added a new column by clicking Insert column after.

The process is almost identical if you want to delete a column or row. Just select the particular cell you want to delete and click on Edit Table➤ Delete Column/ Delete Row.
To center any column, click on the Change text alignment button and the Align column center.

It’s possible to change the overall alignment of your table in WordPress. For this, select any website column and click on the change Alignment. There are different options available here. Next, click on Full width from the list. Now, your table will be displayed on a full-width screen.

This is how you can create tables in WordPress and customize it based on your needs.
Wrapping Up
To make the table generation process simple and easy, we have shown you a straightforward way how to insert a table in WordPress in this post. Once you follow this guide, it will be easy to add tables in WordPress. Share our experience on how this article benefits you in the comments section.
If you liked this post, don’t forget to subscribe to our blog so that we can notify you once any post is published. Finally, you can also follow wpWax on Facebook, Twitter, and LinkedIn for more exciting news, offers, and product updates.

Abdullah Al - Harun
Abdullah Al Harun is a technical content writer at wpWax and a digital marketing enthusiast. Apart from tech, he enjoys reading books on different aspects of communication, journalism, science, and arts. On his time off, you will find him playing cricket with his teammates.


Leave a Reply
You must be logged in to post a comment.