

How to Create a Directory Website in WordPress Gutenberg Block Editor
Creating a directory website or a classified ads website may seem a little bewildering even if you are a software developer let alone a regular netizen. But no worries! WordPress is always there to take you to the rescue with just a few simple clicks.
This tutorial will show you how to create a directory website with WordPress Gutenberg block editor using a free WordPress plugin called Directorist. Upon installing the plugin you will get all the necessary blocks (16+) in the Gutenberg block editor to create the required directory website’s pages.
So without any further ado, let’s jump right in!
Why Use Directorist Free Version to create a directory website in WordPress

In case you are wondering why we will use Directorist, just go through this section. Apart from the Directorist-Gutenberg blocks, you will get the following services and features in Directorist:
- You will get a drag-and-drop-based builder that includes unlimited custom fields.
- Free page builder support Elementor,
- Scalable with multidirectory feature
- Google maps integration,
- OpenStreet map integration,
- Frontend submissions,
- CSV export-import,
- Demo import,
- Separate frontend dashboard for users,
- Rating & reviews,
- Yoast SEO integration,
- RTL language support
- WPML support, and much more.
How to Create a Directory Website in WordPress Using Gutenberg Block Editor
Before you proceed any further make sure you have a WordPress website up and running. After that you can follow these simple steps:
Step 1: Install & Activate Directorist Plugin
First, go to the WP Admin Dashboard > Plugins > Add New > Search for the keyword ‘Directorist’ > Hit the “Install Now” button (as indicated with arrows) >

Next up, you need to activate and configure the setup wizard to make a fresh start. In the setup wizard, you will be able to configure the basic settings such as whether to monetize your website or specify the pricing for each and every listing submission and so forth. Here is a video so that you can get a quick grasp of it:
Step 2: Creating Necessary Web Pages with Gutenberg Editor
Directorist includes the following 16 Gutenberg based blocks:
- All Listing
- Add Listing
- Checkout
- Registration
- Payment Receipt
- Transaction Failure
- Dashboard
- Login
- Single Category
- Single Location
- Single Tag
- All Categories
- All Locations
- Author Profile
- Search Result
- Search Form
These blocks will help you create different pages for your directory website. Supposing that you want to create the “All Listings” page. How to do that.
To do so, go to the WordPress Admin Dashboard > Pages > Add New > Give a name to the pages like “All Listings” > Select the “All Listing” block by clicking on the ‘+’ button > Save or Publish. That’s it!
You can also control other parameters of a page like whether to show the pagination or to show featured only, show Filter Button, show Preview Image, logged In User Only and so many more.
Similarly, you can create all the other required directory pages in WordPress using the other Directorist Gutenberg blocks.
Here is another example of adding the Search Form widget where you can control other parameters like Show Title & Subtitle, Show More Filters Button, Show Apply Filters Button, Show Reset Filters Button, Logged in Users only, etc.
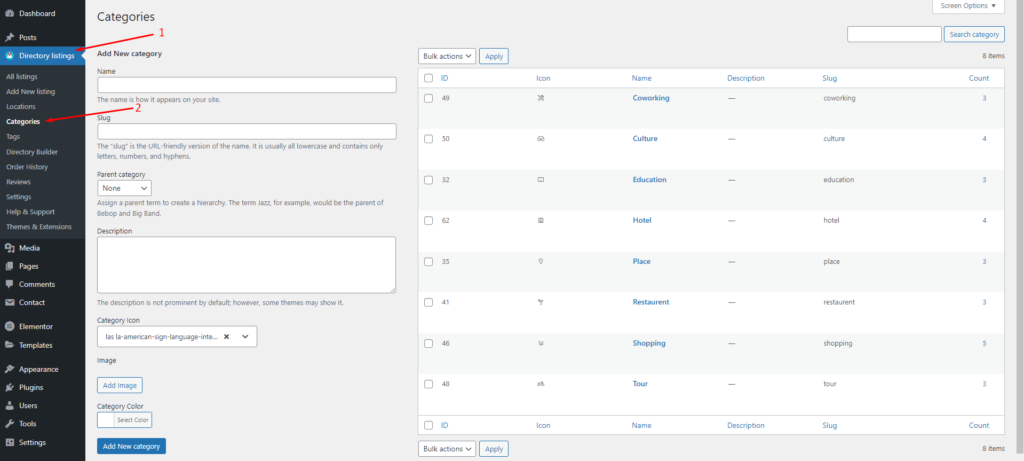
You need to create categories and tags so that listing owners can make their listings more accessible and more relevant to the visitors. To create categories, you just need to go to the Directory Listings > Categories > Fill out the fields > Hit the “Add New Category” button.
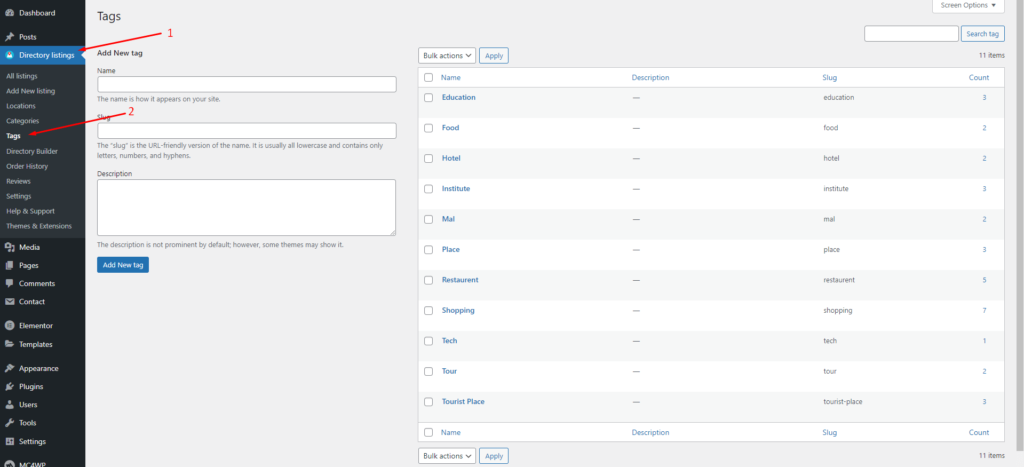
Just like adding categories, you can allow your users to create and find listings that are relevant. You can add tags from Directory Listings > Tags > Enter Credentials > Add New Tag.
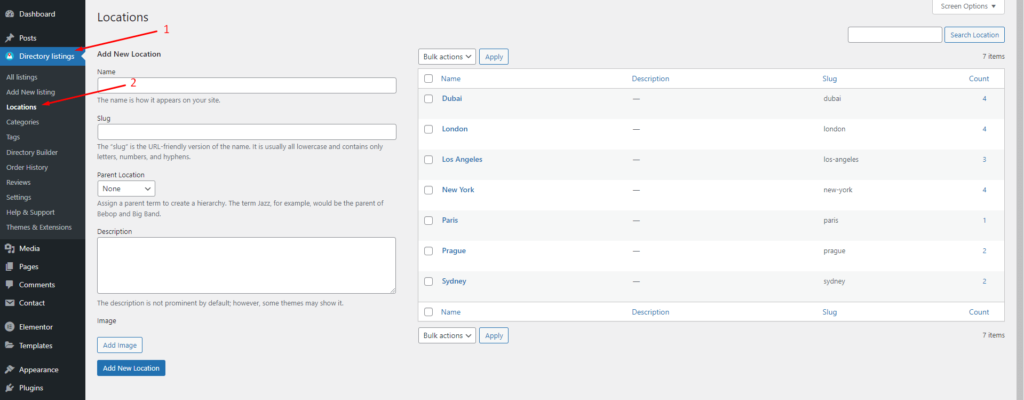
Step 4: How to add new locations
Just like adding categories and tags, you can allow the listing owners to make their listings further relevant to the visitors. This is imperative to make your website more user-friendly. To add locations as an admin, you have to go to the Directory Listing > Locations > Enter credentials (name, description, directory type, etc.) > Hit the Add New Location button.
Step 5: Adding Advanced feature: Monetizing your directory website
You are already done with creating your first directory website with WordPress. However, you can also beef up your directory website with monetization features to make a handsome amount of money. Directorist allows you to monetize your website in the following ways:
- Charge for listings (Free)
- Featured listings (Free)
- Allow businesses to claim listings (Premium)
- Charge for viewing private listings (Premium)
- Allow private/sponsored advertising (premium)
- Charge for membership (Premium)
- Sell business leads (Premium)
- Promote affiliate products (Premium)
- Allow sponsored articles/guest posting (Premium)
- Bookings & appointment (Premium)
- Access control (Via 3rd party plugin)
- Ranked featured lists (Premium)
- Paid ad placement (Premium)
If you want to know them in detail follow this article, “How to Monetize a Directory Listing Website” now!
You can use the first 2 free ways to monetize your directory website.
Step 6: Adding a Free Payment Gateway
Payment Gateways will help you collect payments from your customers. Fortunately, Directorist will allow you to add a free payment gateway like a bank account apart from its premium other payment gateways. If you want to add your bank account details, navigate to the WP Admin Dashboard > Directory Listings > Settings > Monetization > Offline Gateways Settings > Insert your details > Save changes.
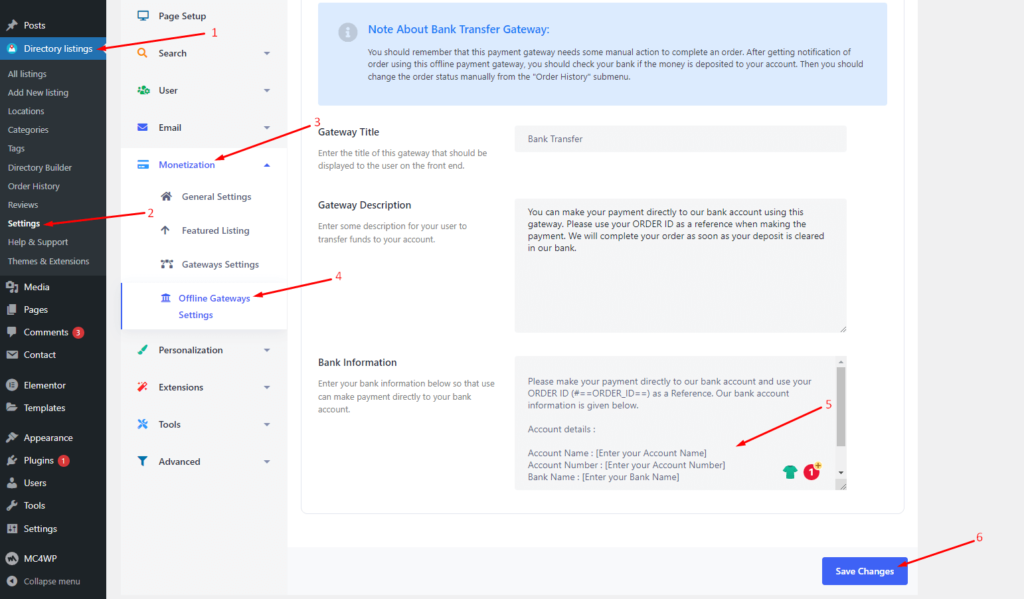
Note about Bank Transfer Gateway:
- You should remember that this payment gateway needs some manual actions to complete an order. After getting a notification of an order using this offline payment gateway, you should check your bank if the money is deposited into your account. Then you should change the order status from the “Order History” submenu.
- Apart from the offline Bank transfer method, Directorist also supports online payments gateways like Stripe, PayPal, and Authorize.net. However, they are available in the premium version only.
Related Post: How to Add Payment Gateways to Monetize Your Directory Website
How the Users or Visitors Will Submit Their Listings
This step is basically for the listing owners who will use the Add Listing form to submit their places or locations onwards. The add listing form or submission form includes all the important fields such as listing type, directory type, pricing, video URL, terms & condition check box, category, tax, location, address, maps, and much more. The user must fill out them before hitting the ‘Submit‘ button.
How the All Listing page will look like
Now, if a number of listing owners submit a bunch of listings the All Listings page layout will look like this:
A visitor can also select a listing card to see them in detail.
Wrapping up
Creating a Directory website with WordPress Gutenberg Editor is downright as easy as falling off a log. If you get stuck at any of these steps, don’t hesitate to address it in the following comment section below. Some of us will definitely come forward to help you out.
If you liked our posts, don’t forget to subscribe to our blog so that we can notify you once any post is published. Directorist is now on Facebook, Twitter, and LinkedIn! You can also join the Directorist Community for sharing your thoughts and experiences relating to the directory niche. Come and join us to see what we’re up to. Finally, you can also follow wpWax on Facebook, Twitter, and LinkedIn for more exciting news, offers, and product updates.


Al Suzaud Dowla
Al Suzud Dowla plays the role of a content strategist at wpWax. He is basically a digital marketing expert and a tech enthusiast (by heart) who excels particularly in technical content writing. In his pastimes, he is seen playing Ping Pong, performing Karaoke, reading books, and playing around with JavaScript as well.


Leave a Reply
You must be logged in to post a comment.