

How to Create a Restaurant Directory Website in WordPress?
Do you want to create a restaurant directory website that is spread out and feature-filled like Zomato, Yelp, Table booking, etc. ? Well !!! You aren’t the only person. There are many people who want to do it in the era of digitalization. Do you know why?
Nowadays, the restaurant directory is gradually growing into a social food community with a higher level of user engagement. So, making a restaurant directory website means that you are going to serve the community along with making money from the site. Moreover, a directory website creates a wonderful way for the listing owners to attract more customers.
In this article, we will walk you through a few simple steps to create a restaurant directory. But, before we start we assume that you have already installed a fresh WordPress. Now you need a directory plugin. Based on your preference, you can take any free directory plugin from the WordPress repository. However, in this short tutorial, we will use Directorist, a free WordPress-based business directory plugin. Also, we are going to use OneListing, a free minimal WordPress directory theme.
Let’s move deeper.
Creating a Restaurant Directory Website: A Step-By-Step Guideline
Creating a restaurant directory website on WordPress isn’t challenging when you follow the right tunnel. Here is how you can effortlessly create a directory website for restaurants with little or no investment. Let’s get cracking.
Installing OneListing
Like any other free theme, OneListing is a very simple thing to install. To do that, navigate to the WP Admin Dashboard> Appearance>Themes>Add new and then activate the theme.
Follow the screenshot if you face any difficulty installing the theme.
Installing Directorist
Once you have installed the theme, you will get a notice on the dashboard to install the Directorist plugin. Installing the plugin means enabling the core functionality of your restaurant directory. To know the installation process of the plugin in detail, you can check the documentation.
Adding categories
Different types of users search different types of restaurant listings. As a restaurant directory owner, you should split your directory into different categories for the convenience of users. For example, you want to add a “lunch” category to your directory. To do that, go to the Listings > Categories. Then specify the name of the category and upload the category image. Finish the process by clicking the “Add Category” button and you can see the category on the front area. In the same way, you can add as many categories as you want.
Adding location
Many users search restaurant listings based on location. So, adding location to your directory is another important thing to do. Let’s imagine you want to add “ Florida”. In order to do this, go to the listings > Locations and fill in the description field if necessary. You can add more locations to your restaurant directory following the above procedure.
Add listings
To add listings in your restaurant directory, navigate to the WP Admin Dashboard > Directory Listings > Add New Listing.
However, the business or product owners will add or submit the majority of the listings. One thing you can do is to check whether the listings violate your community standard or not. And, you can charge money for every listing.
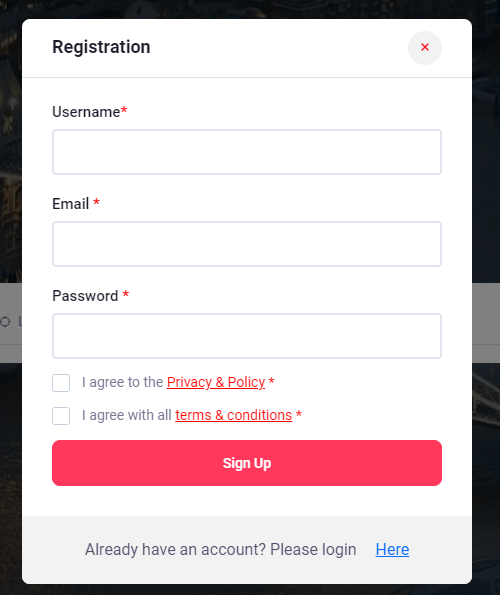
To add listings or products, business owners need to have a registration with your site. Business owners can freely add more listings from the “Add listings” option. You can check the progress, whether the submission is okay or not.
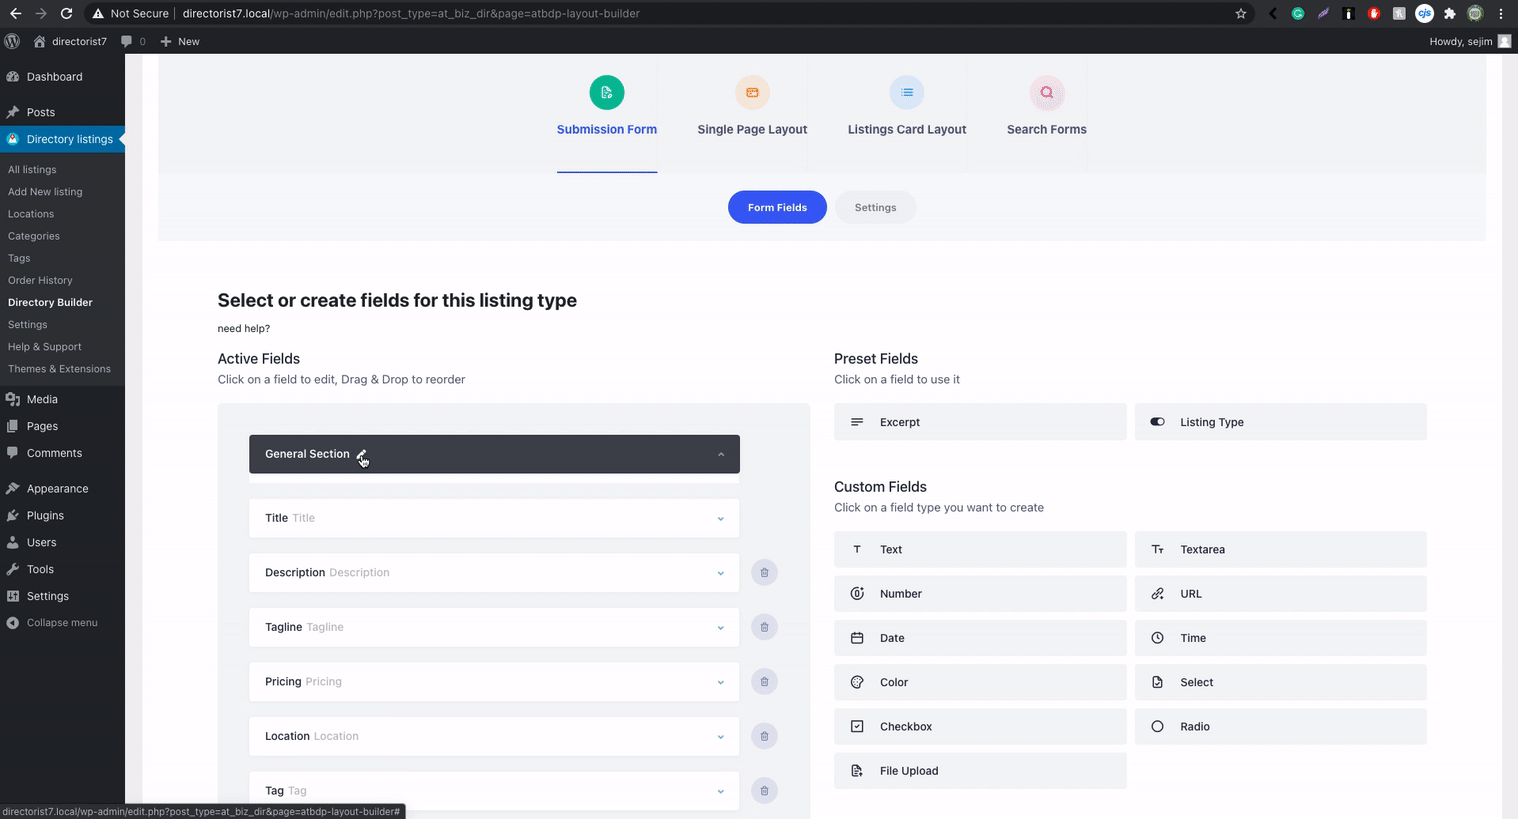
Configuring/customize restaurant directory
Before you add your advanced functionalities, you need to first configure your directory. Now, If you want to customize your directory site, go to the directory builder and configure your directory according to your needs. For the details, check out the user guide on the official website of the plugin.
Extending functionalities
In the previous step, you added the basic functionalities of a directory website. Now, it’s time to extend the functionalities using different extensions. Adding more features to your restaurant directory website will help you to get exposure to more audiences.
For example, you may add the booking/reservation feature to your restaurant directory using the booking/reservation extension. With the booking/reservation option, you can allow the listing owners to control and steer the flow of service-seekers all day long.
Another important feature of the restaurant directory website is the opening/business hour which allows the users to learn when the restaurant is open for foodies. You can simply add this feature to your directory, using the business/opening hour extension.
One more important feature of the restaurant directory is the listing search with the maps. Foodies can easily find their chosen restaurant through maps. Adding this feature to your restaurant directory is easier with the listings with map extension.
You have already got several options to extend the functionality of your restaurant directory and make it more user-engaging. There are still many options left to improve your directory by adding more features which you can try using these extensions.
To add the extension, go to the WP-Admin Dashboard ➝ Plugins ➝ Add New ➝ Upload Plugin ➝ and upload the Extension ZIP file and Activate it.
Final Verdict
Following the steps above will help you to make a restaurant directory website. When you finish the building of the directory website, start thinking of flooding the site with more listings. Once there is a fair number of listings on your website, you are more likely to make money from your directory site.
Now, if you want to create a directory website using a premium restaurant directory theme, you can use dRestaurant as it is specifically designed for a restaurant directory and comes with a set of extensions.
If you liked the post, don’t forget to subscribe to our blog so that we can notify you once any post is published. Finally, you can also follow wpWax on Facebook, Twitter, and LinkedIn for more exciting news, offers, and product updates.

Md Hamim Khan
Md Hamim Khan is the Content and SEO Manager at wpWax, where he creates engaging content that helps improve online visibility. When he’s not at work, he loves playing cricket and enjoys chatting with friends, family, and colleagues.


Leave a Reply
You must be logged in to post a comment.