

How to Add Custom Fonts to WordPress
Using custom fonts will help you expand the list of available fonts and use the ones that match your needs and brand. Fortunately, this functionality can be achieved easily in WordPress with the help of a plugin.
Even though this is easily achievable, you should be aware that you should keep the list of fonts used on your website to a maximum of three, preferably two. Something to keep in mind is that all our themes directly access the entire library of fonts provided by Google. If one of the fonts you need is coming from Google, it should already be included in your theme’s available font options. If you want to learn more about changing your fonts using the existing options, read this in-depth article.
If your fonts are from a different source, then keep reading on. We will now get to the nitty-gritty and required steps on how to add custom fonts to WordPress.
Table of Content
How to Add Custom Fonts to WordPress Using Plugins
Installing plugins to add custom fonts to WordPress is probably the simplest way to accomplish the task. Here are a few of the most popular options.
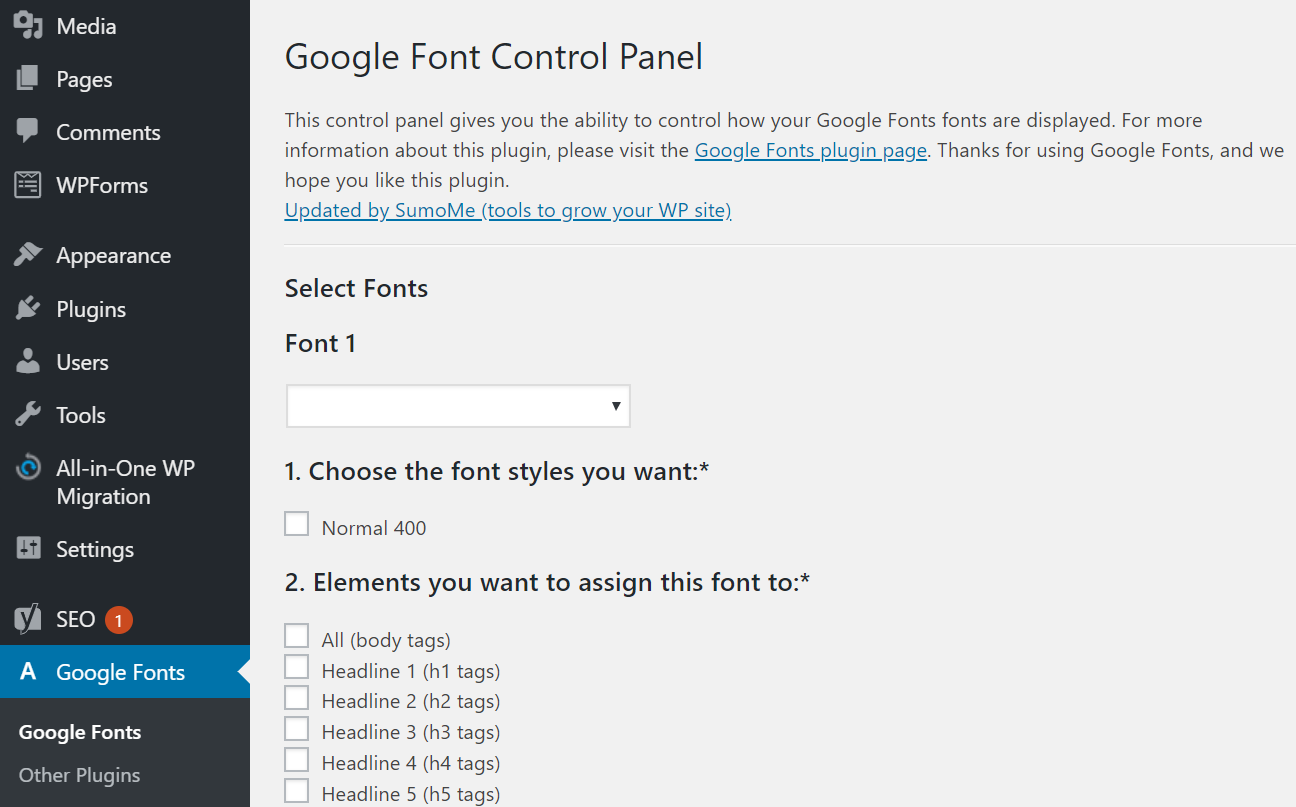
WP Google Fonts
WP Google Fonts offers you the freedom to use custom fonts and apply them to particular CSS elements.
Install the WP Google Fonts plugin from the WordPress plugin directory and open the Google Font Control Panel through your WordPress dashboard. Here you can select fonts and change various settings such as font style, assigned elements, etc.
Easy Google Fonts
With Easy Google Fonts, you can use any theme and preview any font in real-time. It’s also simple to use since no coding skills are required.
Once you have installed and activated the plugin, you can edit and manage font settings by accessing Settings-> Google Fonts. If you want to tweak your theme’s typography immediately, enter your WordPress Customizer by clicking Appearance -> Customise. Next, you can start customizing in the Typography section, where you can manage fonts on any part of your site.
Use Any Font
Use Any Font is another excellent plugin that can help you add several fonts to your WordPress website. Once installed, create a free API key and press the verify button. After the verification, you can upload fonts in TTF, OTF, and WOFF formats. Use Another Font allows you to assign fonts to custom elements as well.
Conclusion
You have learned how to download and convert fonts into a web-friendly format. You also discovered two ways how to add custom fonts to WordPress. Whichever fonts you choose, make sure that it is suited to your site’s theme and style.
Finally, if you have any questions regarding how to add fonts to WordPress, share your thoughts in the comment section below.
If you liked this post, don’t forget to subscribe to our blog so that we can notify you once any post is published. Finally, you can also follow wpWax on Facebook, Twitter, and LinkedIn for more exciting news, offers, and product updates.

Md Hamim Khan
Md Hamim Khan is the Content and SEO Manager at wpWax, where he creates engaging content that helps improve online visibility. When he’s not at work, he loves playing cricket and enjoys chatting with friends, family, and colleagues.


Leave a Reply
You must be logged in to post a comment.