

How to Elevate Your Directorist Experience Using Numerous Advanced Custom Fields
Have you ever felt limited by the default fields in your directory website? You’re not alone. Many directory owners struggle with making their listings stand out or capturing the right information to improve user engagement. This limitation can frustrate users, reduce conversions, and ultimately, hinder the growth of your platform.
According to research, personalized user experiences can boost engagement by up to 80%, and custom fields give you the power to create highly tailored listing submissions that match your niche perfectly.
Whether you’re building a real estate directory, a job board, or a restaurant listing site, adding numerous advanced custom fields ensures every detail is covered—improving searchability, enhancing UX, and increasing the value of your platform.
In this blog post, we’ll explore how to harness the full potential of advanced custom fields in Directorist, allowing you to take your directory website to the next level.
Let’s dive in.
How Directorist Advanced Custom Fields Can Benefit Your Directory Site Build
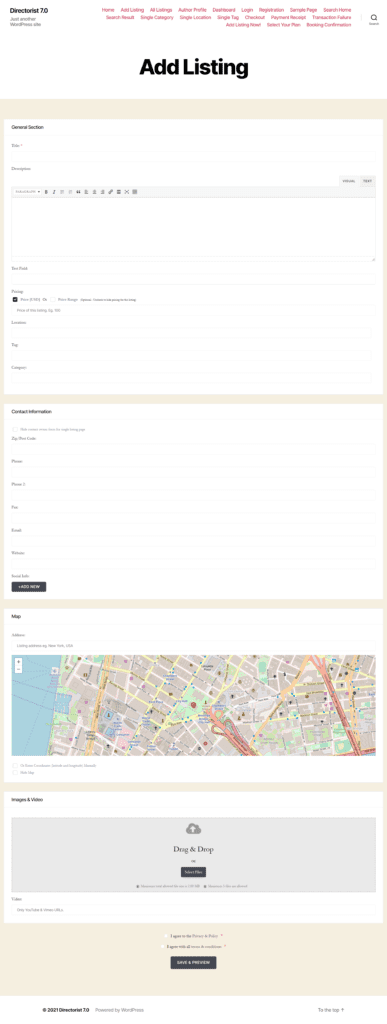
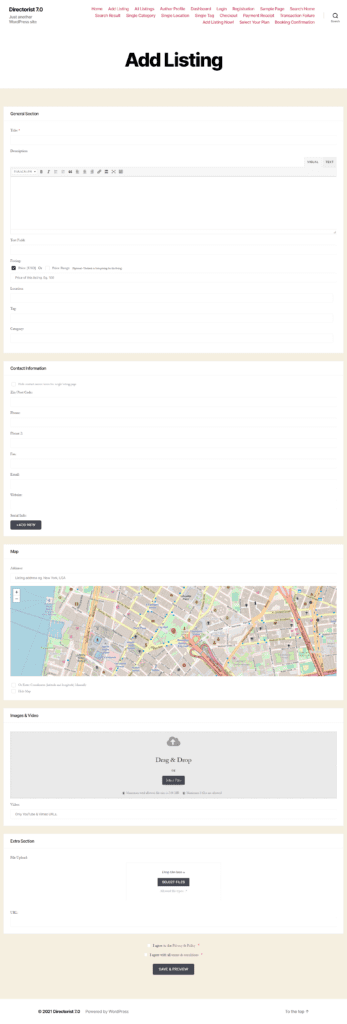
In simpler words, Directorist custom fields help customize the submission form of add listing page, single listing page, and even the search filter form with extreme ease. Let me assume that you have already installed Directorist on your site and now you have the following submission form on your add listing page for your users.

Here you will find a number of default options like General Option, Contact Information, Map, Images, and Video.
Suppose you want to customize the preset fields of the General Section with custom fields. And the current General Section includes the following fields:
- Title
- Description
- Tagline
- Pricing
- Location
- Tag
- Category
Wondering how can You customize it? Let’s break the walls.
How to Customize the Submission Form with Custom Fields
Here you can see how to customize the submission form based on your preference. No more crowings, let’s spill.
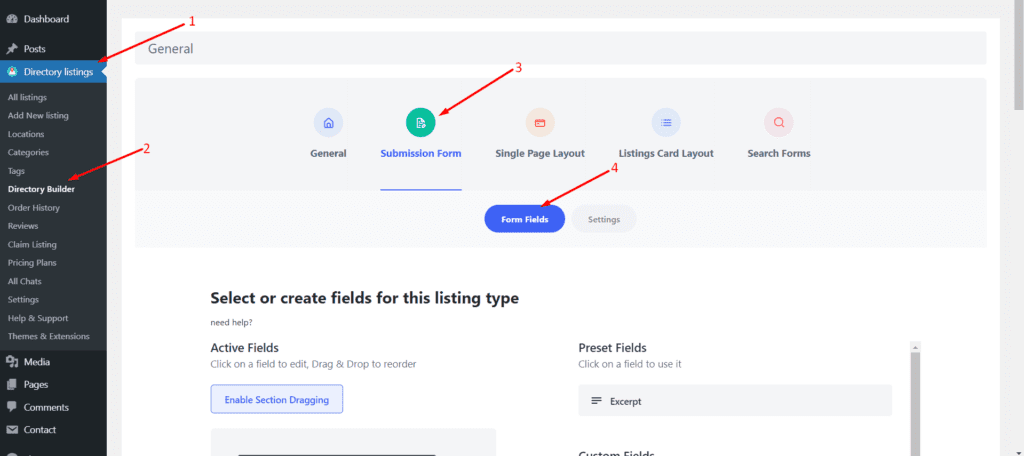
To begin with, go to the WP Admin Dashboard > Directory Listings > Directory Builder > Submission Form > Form Fields. There you will find both preset and custom fields.
Step-2. Customizing the fields
Here are the ways how you can customize the fields. Let’s check them one by one below.
Deleting a preset field
Now, let’s delete the tagline field for example. You can do it either by clicking on the delete sign located on the right side of the field.
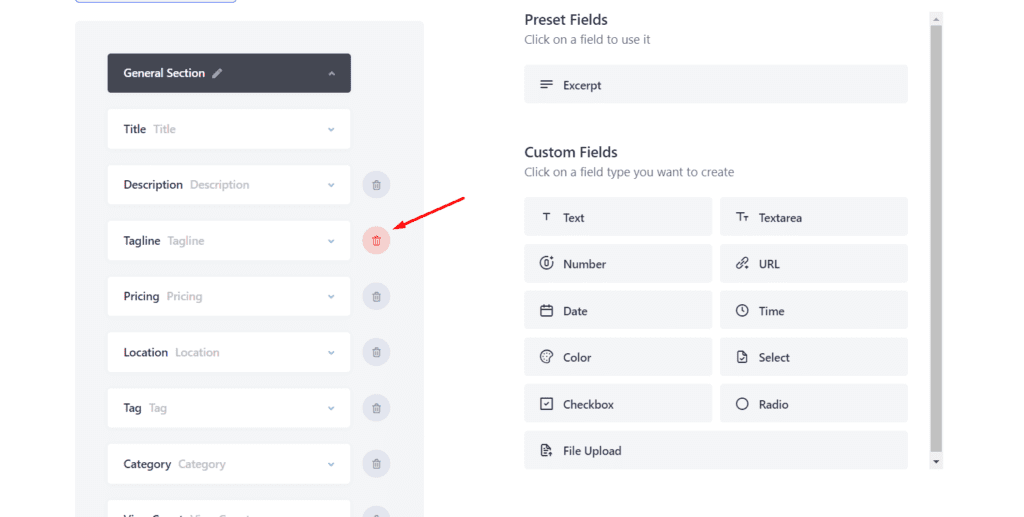
Or by dragging and dropping the field from the left to right section under the Preset Field option. After you delete an active field from the menu it will appear in the Preset Field section.

Adding a custom field
To add a custom field, hover your mouse over the Custom Fields area and click on any field or simply drag and drop them to the General section. Here, for instance, we are selecting the text field:

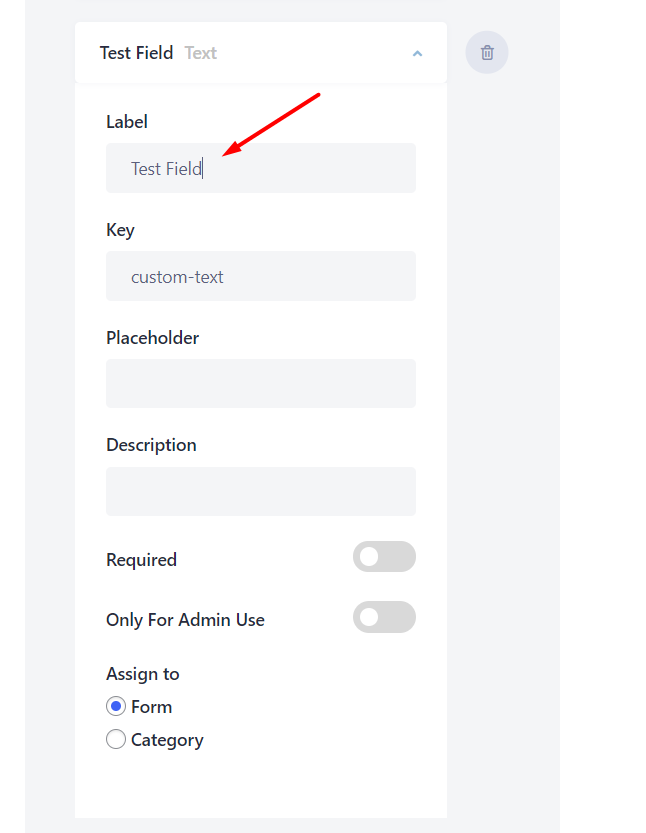
You can also customize the parameters of the text field like changing the Label, Key, Placeholder, Description, Required, Only for Admin Use, etc. In this example, we are going to change the Label to “Test Field” from ‘Text’.
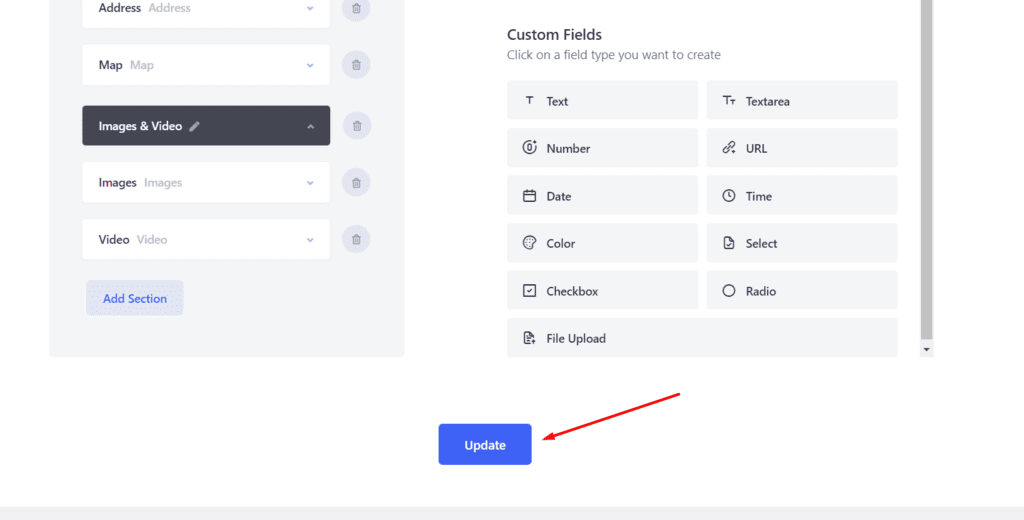
Now, save changes by hitting the “Update” button from below.
The game is over!!!! You have covered customizing the submission form of Add listing.
How You See Custom Fields on The Frontend
Now, reload the add listing page to see the changes we have made just now. After that, you will be able to see that the Tagline has gone and the new “Test Field” has been added there.
To Add an Entire Section
However, if you want to add an entire section, feel free to use the Advanced Custom Fields option. To do so, select the Add Section option from the Submission form.
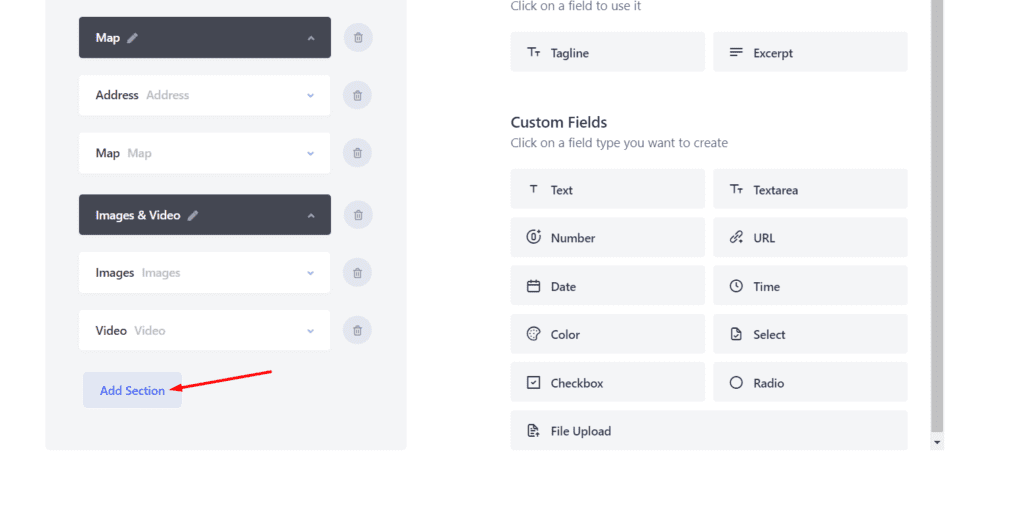
After selecting the “Add Section” option, you will see a pencil icon to change the Group Name:

Now, click the pencil icon again to hide the Group Name option.
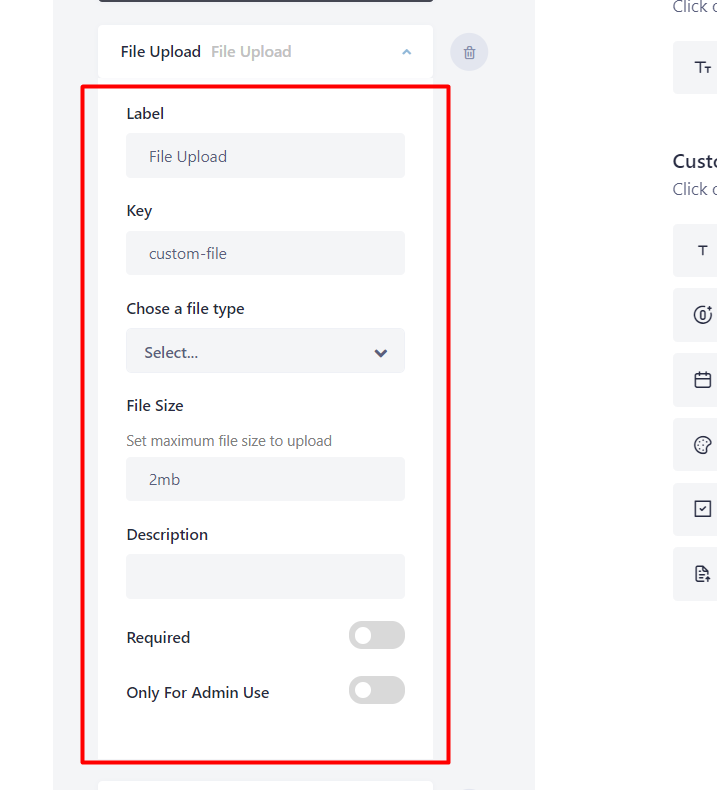
Next up, let’s take the URL field and File Upload field to the Extra Section area:
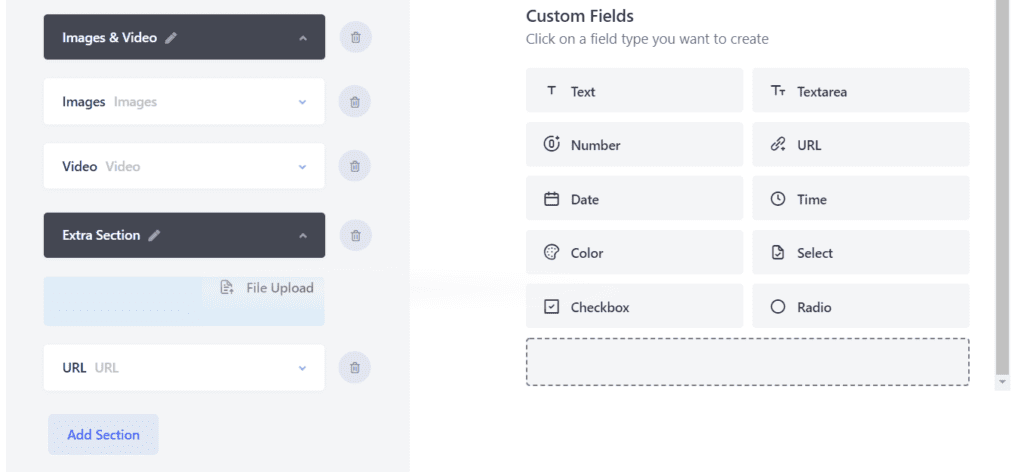
You can also change the attributes of these fields. For example:
- Label
- Key
- Choose a File Type
- File Size
- Description
- Required
- Only for Admin Use
Don’t forget to hit the Update button to save the changes.
Now, let’s see from the frontend if this Extra Section does appear:
There you go! The Extra Section appears at the end of the Submission form.
Last Hurrah
A custom field is something that can easily steal the show and make your website page look varied from your competitors. In our tutorial, we have brought a few custom fields to the screen. To know the details, you can head over to the official documentation of the Directorist custom field.
Or else, if you have already installed Directorist and started customizing the submission form of your Add listing page, then don’t hesitate even a bit to share your experience with us by giving a bell on the comment section.


Md Hamim Khan
Md Hamim Khan is the Content and SEO Manager at wpWax, where he creates engaging content that helps improve online visibility. When he’s not at work, he loves playing cricket and enjoys chatting with friends, family, and colleagues.
Related Articles


2 Comments
Leave a Reply
You must be logged in to post a comment.
Andrew
August 4, 2022 7:36 pmHi, love this plugin.
Is there the option to add further custom image fields, rather than just the preset image field?
Md Hamim Khan
August 10, 2022 2:32 pmHello Andrew,
Thanks a bunch for your wonderful comment. You can check out our gallery extension: https://directorist.com/product/directorist-gallery/